Monday, November 27, 2017

Create users in Azure AD

In this post I'll show you how to create new users in your Azure Active Directory so you can use them as service accounts or to grant other users to login to your Servers or services as well as how to enable them so you can use it, I didn't know that and the documentation was not as explicit as you would love, however I consolidate both tasks here.

  1. Go to Azure Active Directory 

  1. In the "Name" field type in the give name of the user
  2. Type the fully qualified name name@domainname.onmicrosoft.com
  3. Configure the Profile details
  4. It won't let you change the details so you can leave it that way
  5. Configure the Groups it will have access to
  6. Select the role it will have in the active directory the options are (Regular user, Global Admin, Limited Admin)
  7. Password: Make sure to copy the password as you are not able to retrieve it later this is auto generated and you are not able to change it, and the user is configure to change it at the first logon.
  8. Before clicking create, your window will have to look like this


Alright, you have your account created, however it wont work until you synchronize the password, or in other words, until you enable your user by logging in to the active directory, however, how can you do that? This is something hard to find out there in the web, even when the steps are simple, reason why I'm including it with this post.

1. Navigate to this URL: http://myapps.microsoft.com/
2. When asked for the logon user, use the one you just created

3. Type in the password you copy from the creation window, then it will route you to this other page where it asks you to configure a new password, type in the new password. 

And you are done, once that you have successfully updated the password it will route you to this screen meaning that you successfully create and activate the account. Now you are ready to use it to join your machines to the domain, configure it as service accounts, etc.

Hope this and the post from last week lets you get started and working with Azure.


Thanks for reading!

Monday, November 20, 2017

Configure an Azure AD Domain Services

Problem: I was working on getting a demo on how to setup Always On with SQL Server 2017 without the need of creating a windows cluster, I had my two VM's in Azure and everything was working fine until the creation of the availability group, it failed and it was because the account under which the server was running was the default "NT Service" which is not allowed (not to mention is a concerning security issue) so instead I decided to join both VMs to a domain, as mentioned before, this were Azure VM's so the creation of a traditional domain as you know it on premises was a hard task to do (not to mention the cost for each of the servers) however by looking through I came across a service, Azure AD Domain Services that provides a seamless experience as a traditional domain controller, but as a service (PaaS) which is great because it does almost everything for you so here are the steps as to how to set that up.

All the steps are in this URL: https://docs.microsoft.com/en-us/azure/active-directory-domain-services/active-directory-ds-getting-started follow it thoroughly however, here are some annotations from my own experience:

Task 1: "configure basic settings"
DNS domain name: choose the name of your preference with the add of ".onmicrosoft.com" unless you have something else configured it won't check your name as valid.
Resource group: You can create a new resource group or use an existing one, it won't break anything that you have in your group if you choose "Use Existing"

Task 2: "Configure network Settings"
In here you have the option to either Create a new one or use an existing one, my recommendation, create a new one, in my first attempt I choose an existing one and spent 2 days cleaning everything up as in the middle of the creation it fail.

Task 3: "Configure administrative group"
In this task you create the equivalent of "Domain Administrators" group, so make sure that you add the members you want to be domain admins in your Azure AD (AAD).
After finishing this task, it will start the process on provisioning the resources, once this is done, your domain will be almost ready, before that you still need to configure your DNS. How to know when is done? When you go into the overview of the domain you are able to see the section "Update DNS Server settings for your virtual network"

Task 4: "Update DNS Server settings for your virtual network"
Make sure that you choose "custom" and copy both IPs onto the boxes as shown in the steps, this step is so that you can configure you DNS servers with the ip of the services (that will serve as Domain controller servers) Azure provided for you, take this as a verification step of the process.

With that you are done, you have successfully configured your Active directory as a service and you are good to go and work like if you were in an on premises domain, you will only need to configure your accounts to the services or if you didn't do it in the task #3, you can create an account to manage your domain (Join the machines, create other accounts to configure as Service Accounts, ETC).

In a following post I'll show you how to create and enable users in your Azure AD.


Thanks for reading!

Wednesday, November 8, 2017

Contained Databases setup

 Last week I wrote about what is a contained database, the benefits and challenges, today as promised I'll show you how to setup one, how to configure a user and how to connect to it so let's get started.

Step 1
After logging in to your SQL Instance, go to the instance properties.

 Step 2
In the properties page, select advanced and in the first section choose "Enable Contained Databases = True" With this you will be enabling the feature at the instance level so that you can setup your databases this type.

Step 3

Go to the database that you want to convert to a contained database and click properties, then go to options and in the Containment Type choose Partial.

With the above steps you have now your first contained database, however at this point there is nothing different as if you try to connect to the database with the accounts or users that are already granted at the instance level you will see no difference, for you to see the difference you will need to configure one use or account at the database level as follow.

Step 4

Go to the security folder inside the contained database, go to the Users folder and choose "Create new User", it will prompt you the following window where you will create your user, remember to configure the privileges that you will allow it to have, and always remember the best practice is to follow the least privileged principle.

Ok so you have now your user created, let's try to connect

Step 5.1 connecting to SQL Server as usual

Wait, what happened? We created the user, now it is not able to connect?


Step 5.2 To take advantage of the containment, you will need to select directly the database that you want to connect, you can do this by clicking on the "Options Button" at the bottom right corner of the screen, the logon window will change, so then you will need to go to the Connection Properties tab and in the "Connect to Database" section, you will need to write the Database name, it shows the option to lookup, however if you are not logged in it will tell you that you need to login first and you will end up in a circle where you can't authenticate, so better write down the database name so you can enter it here.

Step 6 Welcome you are now connected directly to your database. Can you see the difference? With an account that is granted at the server level you can see all the databases in the SQL Instance, however when you are connected to your contained database, it shows you only the database that you have permissions, creating an isolation of the environment.

Tests:
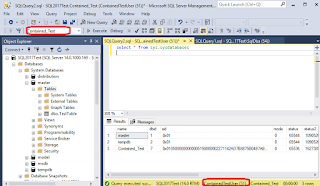
Now lest do some tests, imaging that you are sharing the account with someone from the production control team and that person has a little bit of knowledge in SQL, and tries to discover it there are more databases in the instance, the query will only return 3, Master, tempdb and the contained database it has permissions, why this 3? Well, master has the metadata that it needs to work with, if you create temp objects you will need to rely on the tempdb, but that's it.

For the second test, I created another contained database and tried to run queries against, however it doesn't lets me do it, why? It was not mentioned in last week's post but other of the limitations is that you can't run queries across different databases, unless you have the guest account enabled, which is not this case and that strongly not recommend.

Summary: Contained databases is a feature that provides isolation between environments if you are running databases that requires this kind of separation, also by using this feature you don't have to worry about migrating users, roles, etc. when you move your database from one server to another, either because you are migrating, upgrading or recovering your server, also this portability eases the configuration and security administration when you have Always On Availability groups configured for you HA/DR environments.

Wednesday, November 1, 2017

Contained Databases

Today's post is in regards a feature that was released with SQL Server 2012, it hasn't gotten the attention or used that it deserves even when it helps solving a lot of problems you face when upgrading or migrating the database servers and is Contained databases.

What is a Contained database?
A contained database is a database that is isolated from other databases and from the instance of SQL Server that hosts the database. A contained database basically includes all database settings and the metadata within itself thereby resulting in no configuration dependencies on the instance of the SQL Server Database Engine where the database is actually installed. Users will be able to connect to a contained database without authenticating a login at the Database Engine level. This feature really helps to isolate the database from the Database Engine thereby making it possible to easily move the database from one instance of SQL Server to another, this is incredibly useful when you have HA environments. The Contained databases feature is available at the instance level and is not enabled by default.

What type are available?
Contained database feature provides two containment modes:
None – By default each database has its mode set as NONE. This means there is no contained database feature being used.
Partial – With partially contained databases, we can define boundaries between databases and the server, so the metadata will exist inside the databases. It makes SQL Server databases more portable and less dependent on underlying hosts.

Advantages of contained databases :-
1. User authentication can be done at database level, so you only need to be sure to grant the users permissions in your database.
2. Have less dependency on instance than conventional databases. Objects & features of each database can be managed by them self, reduce workload of system database & SQL instance
3. Easier & Faster to migrate databases from one server to another. Errors related to missing users and orphan users are no longer an issue.
4. Contained database users can be Windows and SQL Server authentication users.
5. Contained database user can access only contained database objects. They cannot access system databases and cannot access server objects.
6. This is the preferred mode to be used with HADR (Always On)
7. Maintaining database settings in the database, instead of in the master database increase security & flexibility. Each database owner have more control over their database, without giving the database owner sysadmin permissions.
8. To close collation issues in contained database. New feature catalog collation introduced with contained database. Now database collation works for user objects & catalog collation works for system objects in database. Catalog collation will be same for all contained databases on all SQL instance, also this collation cannot be changed.

Disadvantages and Limitations of contained databases :-
1. A database owner has more control on contained database, User can create contained database users without the permission of a DBA that can lead to security issues & data theft threat
2. Contained databases cannot use replication, change data capture, change tracking, numbered procedures, schema-bound objects that depend on built-in functions with collation changes
3. Before changing containment settings at database level from NONE to PARTIAL , contained databases feature needs to be enabled at instance level, so make sure to enable it before releasing your server and database to production.
4. To connect to a contained database, you need to specify the database name in the default database option tab.
5. Temporary stored procedures are currently permitted. But can be removed from future versions of contained database.
6. Contained database user can access other databases on the Database Engine, if the other databases have enabled the guest account, which can be a security issue.

Changes cross versions:
This feature hasn't gotten any change since it got released with SQL 2012, mostly as the new versions have been focused in improving the performance, security and integrating Artificial Intelligence and Machine learning features, however, personally if you have environments where you need High Availability and every time that you failover your groups you need to resynch your users and principals, this might work for you, however, you will need to remove you database from your availability group if you want to enable this in your database, but we will be working with it in next week's post.

Thanks for reading!

Resources:

SQL Server 2008 end of support